The multiplication of plants is child’s play in many cases. However, a few basic precautions increase the chances of success. We explain in this complete guide the good ways to multiply your houseplants.
The 4 main methods of plant reproduction
Always use perfectly clean containers, free of all traces of previous cultures. It is best to soak them for an hour in a solution of potassium permanganate or formalin, which destroys harmful microorganisms.
Substrates for propagation must also be free from pests. The wisest thing, in most cases, is to use a store-bought compost. This, in principle, is disinfected.
If you prefer to use your own earthy mixture, it should be disinfected with commercial formalin. If you only need a small amount of soil, you can cook it in a saucepan with plenty of water; it will then be left to rest for several days before using it.
Another precaution is essential when taking cuttings or grafts: sanitary selection. That is to say, one must choose from among the plants available those which present to the naked eye the best sanitary condition and the greatest vigor, and mercilessly eliminate those which appear unhealthy or have been vegetating poorly for a long time. time. In addition, when taking cuttings or grafts and when cutting a plant, it is necessary to ensure that the tools used are perfectly clean.
Read also: Indoor plants: fertilization techniques
Water: an essential element
It can happen that, despite all the precautions taken, the multiplication is reduced to nothing because of the poor quality of the water. This does not necessarily mean that it is dirty or impure, but rather that it is too acidic or, on the contrary, too chalky.
The pH of water, as well as that of soil, is fairly easy to determine with commercially available test papers. On the other hand, it is relatively difficult to change the acidity or alkalinity of the water. The simplest is, in the latter case, to use demineralized water at very low pH (boiled water). In any case, it is necessary to water carefully, and even sparingly, the seedlings, cuttings and recently grafted plants.
1. Seedlings
This sexual reproduction operation makes it possible to obtain a large number of young daughter plants in a short time. However, these do not always show all the typical characteristics of the parents.
The germination faculty, or longevity, of the seed being very variable from one species to another, it is advisable to obtain supplies from a specialized seed producer. In addition, when ordering, you must specify the genus, species and variety desired and require that this various information be shown on the packaging, as well as the expiry date.
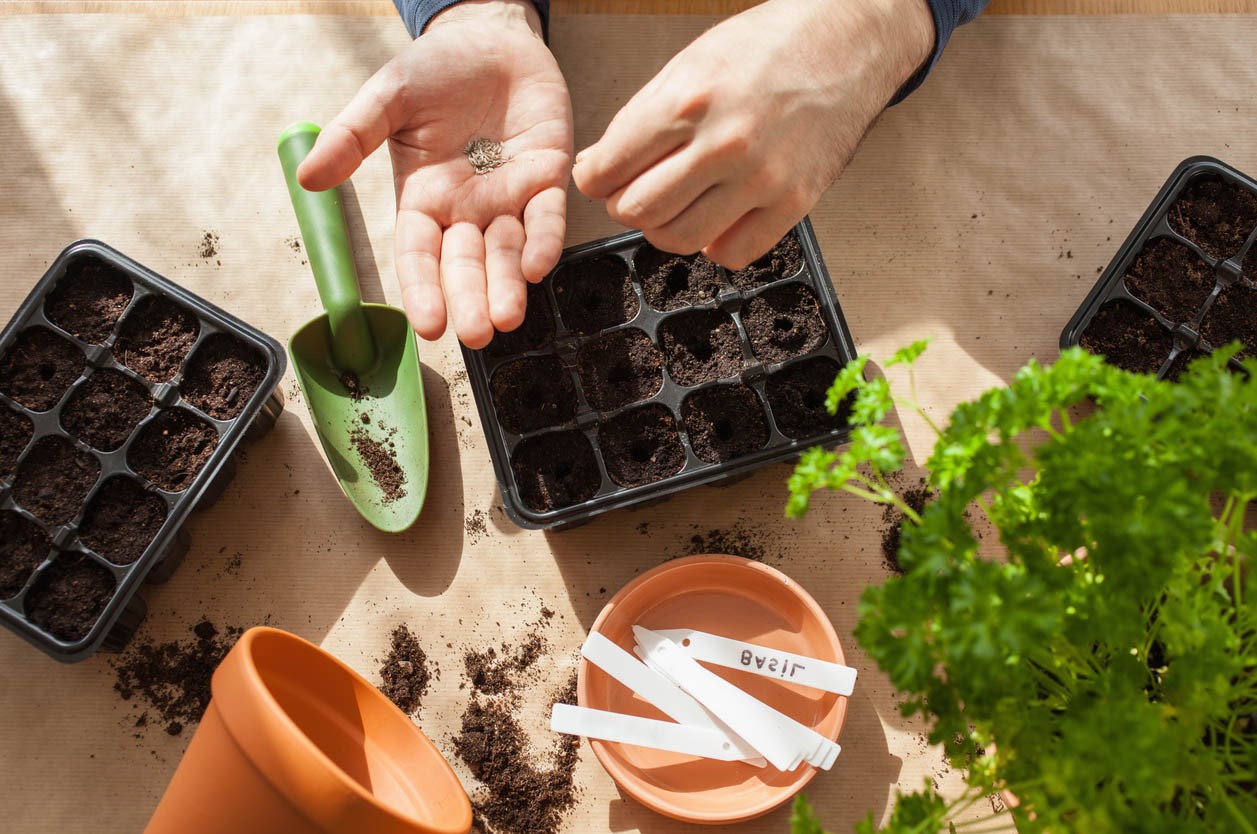
The seeds being ready to be sown, it is necessary to prepare the sowing terrine. This should be very clean. Place in the bottom of the container, after making sure that the evacuation holes are free, a layer of pottery shards 1.5 or 2 cm thick. This draining layer is covered with the multiplication substrate, which will be either a commercial compost, or a mixture that we will have made ourselves. The soil is compacted reasonably and regularly (without forgetting the edges) with a clean board fitted with a handle.
Sowing is carried out as follows:
- very fine seeds (begonia) are pre-mixed with clean, dry sand; the volume to be spread on the ground is thus greater, which facilitates a more regular distribution;
- small and medium seeds are sown regularly over the entire surface of the earth using a sheet of paper folded in half;
- the large seeds are placed individually, in rows spaced 3 to 4 cm apart, at an equal distance on the row, then buried slightly.
Preparation and realization of a seedling:
- In a box, preferably wooden, place a sufficiently thick layer of chippings or pieces of pottery. Cover with potting soil up to 2 cm from the edge
- Sow in rows or broadcast using a sheet of paper or card stock to distribute the seeds evenly. Cover with a thin layer of potting soil. Tamp lightly with a plank
- Water the apple, without flooding: the seeds must not reappear.
- Cover with a glass plate. Darken with a newspaper. Place at 20-25 ° c
Some hard-peeled fruits require stratification. This operation, which generally begins several weeks before the actual sowing, consists of placing the seeds (fruits) in damp sand, in a temperate place. The bark softens, allowing the seedling to come out quickly. Sowing takes place when the bark is about to burst or even when the young seedling is almost out. The seeds being in place, it is advisable to cover them with a thin layer of sand and peat, which one compacts very lightly.
Watering takes place either by sprinkling with a fine sprinkling head, or by capillary action. In the latter case, the terrine is placed in a container full of water, so that it rises regularly, by capillary action, to the level of the seeds. When the operation is finished, a clean sheet of glass is placed on the terrine; it is stored in a place sheltered from drafts and where there is a gentle background heat (near a radiator for example).
A temperature of 20-25 ° C should be maintained throughout the germination time.
2. Plant transplanting
Young seedlings are transplanted when they exceed 1 or 2 cm in height. They are then lifted with a spatula and transplanted into a deeper terrine or a small pot of peat, which will decompose in the soil. The spacing between the plants varies according to the vigor of the subjects and the species.
3. The cuttings
This method of reproduction is quite fast, faithful in the conservation of the characters of the parent and quite easy to achieve. Most greenhouse and apartment plants multiply well by cuttings: flowering or leafy begonia, cissus, coleus, ficus, philodendron, peperomia, etc.
Before proceeding with the cuttings, care must be taken to properly clean and disinfect all the instruments useful for this operation. In addition, one must absolutely choose healthy and robust mother plants.
Cups 8 or 9 cm in diameter are prepared in advance, intended to receive the cuttings, they are disinfected and filled with an earthy mixture composed of half of sand and half of fibrous peat. Instead of pots, small plastic baskets can be used, as long as they are placed in a bowl filled with well-drained peat to prevent drying out. The cuttings will be short so as not to tip the pot. Whether they are hardened cuttings (lignified at the end of the summer of the previous year) or not, the sectioning is always done under a node: the cells of this part of the plant have the ability to reproduce. very quickly giving birth to roots (bottom) and one or more growth buds (top). The cut should be clean, without burrs. Bulky and unnecessary lower leaves are removed and, if necessary, the volume of the upper leaves is reduced.
The cuttings of shoots (buds) and stems are made according to the same principle. Leaf cuttings are done a little differently. You have to detach the entire leaf and plant it with its petiole (peperomia, saintpaulia). In the case of begonias with decorative leaves, sections of the leaves are planted vertically or flat (horizontally on the ground). Another method consists of placing a whole leaf flat on the ground, the veins of which are severed. It is fixed with hooks (bent pins) to prevent it from lifting.
Once the cutting has been cut, it is placed in its bucket filled with substrate, then the leaves are moderately watered and put “in the stifle”. This process consists in maintaining the cuttings in an atmosphere supersaturated with water, in partial shade and at a temperature close to 25 ° C (under a plastic film for example).
A healthy plant is generally not attacked by diseases. When this happens, the diseased cuttings should be removed immediately and those that are still unharmed should be sprinkled with a sulfur-based anticryptogamic agent. Watering is done by capillary action.
A simple method for large cuttings: place the cups with their contents in a plastic bag closed with clothespins; when the roots have developed well, ie five or six weeks later, the air must be allowed to enter the enclosure gradually to allow the plants to harden.
Then repot in a larger container, the growing medium of which varies depending on the species.
4. Air layering
This process is mainly used to save the leafy end of a plant that is bare at the base (philodendron, ficus, dieffenbachia).
The stem is incised on both sides at the desired height (under a leaf). In some cases (very thick stem), it can be stripped of its bark over 0.5 cm wide and 2 cm high. Sphagnum moss is then placed around the notch over 10 cm high; the foam is ligated and moistened. This sort of mossy “sausage” is covered with a piece of plastic film, tightened with raffia at both ends. Four or six weeks later, the roots appear at the periphery of the “bag”. After carefully removing all material, cut the stem below the roots and repot this new plant in an earthy growing mix.
Read also :